Key Characteristics of CHG Disinfectant Swabs

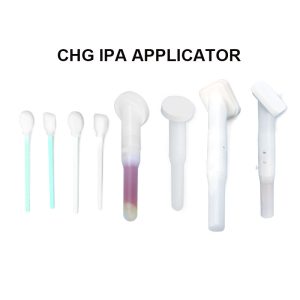
CHG disinfectant swabs are a medical-grade product designed for effective skin antisepsis. Their core features stem from the active ingredient—Chlorhexidine Gluconate (CHG)—combined with a convenient, ready-to-use applicator.

I. Core Efficacy (Driven by CHG Formula)

  • Broad-Spectrum Antimicrobial Action: Effective against a wide range of Gram-positive and Gram-negative bacteria, certain fungi, and some enveloped viruses.

  • Persistent Antimicrobial Effect: This is a defining feature. CHG binds to the skin to form a protective film, providing long-lasting activity (from several hours to days) that significantly reduces skin flora and inhibits regrowth.

  • Rapid Action: Begins to kill microorganisms quickly upon application.

II. Design & Convenience (Swab Applicator Advantages)

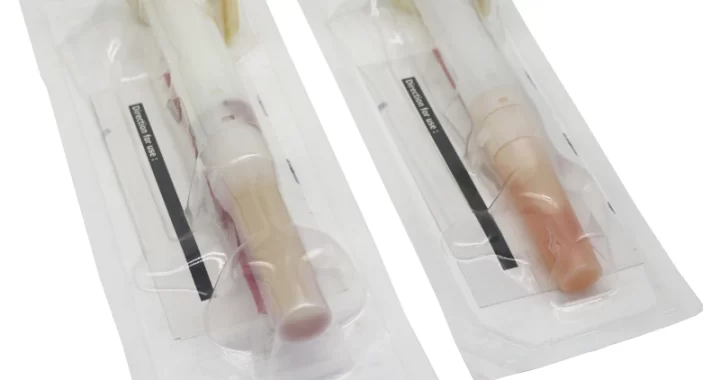
  • Individually Sterile-Packaged: Each swab is sealed separately, ensuring sterility, preventing contamination, and allowing for easy portability and storage.

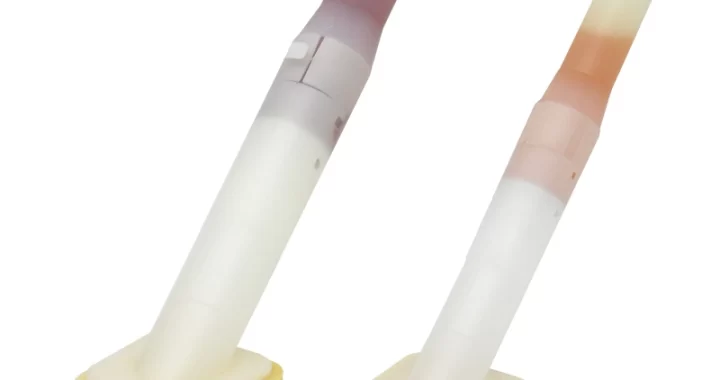
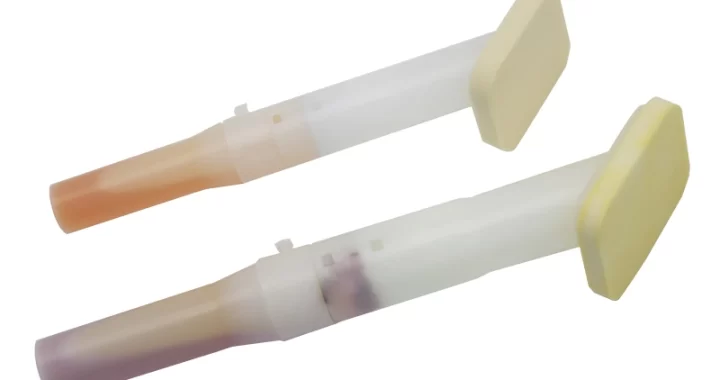
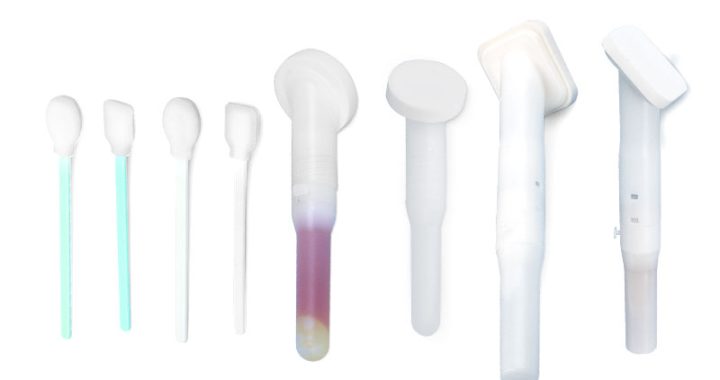
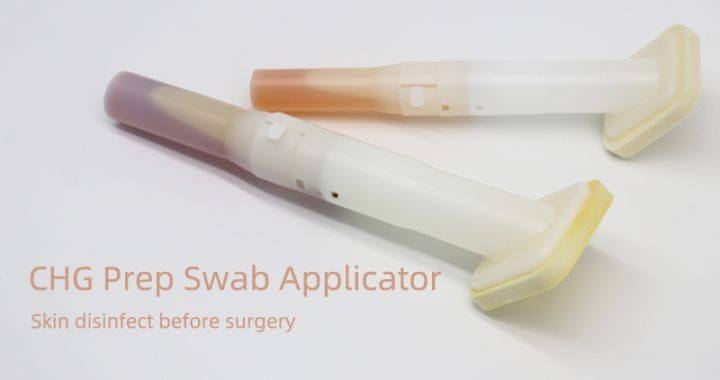
  • Ready-to-Use Design: The swab stem is typically pre-filled with the CHG solution. It is activated by squeezing or breaking the stem (depending on design), instantly saturating the tip without needing separate disinfectants.

  • Precise & Easy Application: The swab format allows for targeted, controlled application with minimal dripping, ideal for small areas like injection or puncture sites.

  • Single-Use: Eliminates the risk of cross-contamination.

III. Application & User Benefits

  • Primary Use: Ideal for skin preparation before critical procedures, including:

    • Surgical site preparation

    • Intravenous (IV) catheter insertion and maintenance (e.g., PICC lines, central lines)

    • Blood culture collection and general injection sites

    • Cleaning around wound perimeters

  • Low Skin Irritation: Compared to other antiseptics like povidone-iodine, CHG (especially at common concentrations like 2%) is generally less irritating, less likely to cause allergic reactions, and does not stain the skin.

  • Non-Volatile: Unlike alcohol-based solutions, CHG does not evaporate quickly, allowing it to remain on the skin to provide persistent protection.

  • Visual Indicator (Common Feature): Many CHG swabs contain a colored dye (e.g., pink) to provide a clear visual guide of the disinfected area, ensuring complete and adequate coverage.

IV. Safety and Clinical Impact

  • Compliant with Medical Standards: Manufactured and sterilized (e.g., with Ethylene Oxide) to meet strict medical device requirements.

  • High Efficacy with a Favorable Safety Profile: CHG is proven to be safe and effective for skin antisepsis at recommended concentrations.

  • Proven Infection Reduction: The combination of rapid and persistent antimicrobial action is clinically proven to help reduce the risk of Surgical Site Infections (SSIs) and Catheter-Related Bloodstream Infections (CRBSIs).

Summary

In essence, CHG disinfectant swabs offer a powerful combination of:

  • Efficacy: Broad-spectrum + Persistent antimicrobial action (Core CHG benefit).

  • Convenience & Safety: Sterile, ready-to-use, single-use applicator (Swab form benefit).

  • User Experience: Precise application, low irritation, and visual confirmation.

They are primarily used for skin antisepsis prior to invasive medical procedures and for the maintenance of vascular access devices.

Dual-Action Antimicrobial Care: The Scientific Protection of Huachenyang CHG+IPA Applicators

Minor wound care is the first line of defense against infection, yet traditional cotton swabs have limitations in antimicrobial efficiency, ease of use, and hygiene control. To provide a more professional solution, the Huachenyang brand introduces its dual-action antimicrobial applicator. Combining the dual antimicrobial mechanisms of CHG (Chlorhexidine Gluconate) and IPA (Isopropyl Alcohol), it helps users achieve efficient and persistent skin cleaning and disinfection, reducing the risk of infection.


Dual-Action Antimicrobial: Unveiling the Scientific Principles
The Huachenyang Dual-Action Antimicrobial Applicator employs a scientifically validated formula with synergistic action between CHG and IPA, providing both immediate and prolonged dual protection for skin preparation and wound care.

  • CHG (Chlorhexidine Gluconate): The ‘Long-lasting Guardian’ that disrupts cell membranes
    CHG, or Chlorhexidine Gluconate, is a widely used component in medical disinfection. Its mechanism of action involves rapidly adsorbing to the bacterial cell membrane surface, disrupting its integrity. This leads to the leakage of intracellular contents, rendering the bacteria inactive. This mode of action allows CHG to form a persistent protective film on the skin, providing long-lasting antibacterial effects and helping to reduce the risk of bacterial regrowth.

  • IPA (Isopropyl Alcohol): The ‘Instant Vanguard’ that causes rapid denaturation
    IPA, or Isopropyl Alcohol, is a highly effective and fast-acting disinfectant. It works by penetrating microbial cells, causing rapid denaturation and coagulation of proteins, which disrupts normal metabolic functions and achieves rapid sterilization. IPA is highly volatile and acts instantly, making it suitable for scenarios requiring immediate cleaning, effectively reducing the microbial load on surfaces.

  • Synergistic Action: Dual Protection for Immediate and Long-lasting Effects
    The combination of CHG and IPA creates a synergistic enhancement. IPA acts as the ‘Instant Vanguard,’ quickly eliminating most surface microorganisms. CHG then serves as the ‘Long-lasting Guardian,’ remaining on the skin to maintain antimicrobial activity. This dual mechanism not only enhances overall antimicrobial efficiency but also creates a cleaner environment for subsequent care, making it suitable for various skin preparation and daily disinfection needs.


Why Choose the Huachenyang Dual-Action Antimicrobial Applicator?
With its scientific formulation and user-friendly design, the Huachenyang Dual-Action Antimicrobial Applicator offers multiple advantages in both medical and daily care settings:

  • Effectively Reduces Infection Risk: The dual-action mechanism of CHG and IPA helps reduce bacterial counts in skin preparation areas, supporting infection prevention.

  • Convenient and Hygienic to Use: Single-use, individual packaging ensures a sterile state for each use, preventing cross-contamination. It is easy to carry and apply immediately.

  • Precise Liquid Control: The unique applicator design allows for controlled liquid dosage, reducing waste and improving operational efficiency.

  • Wide Range of Applications: Suitable for various medical and daily scenarios, including pre-procedural skin disinfection, minor wound care, and injection site cleaning, meeting diverse needs.


Standardized Production, Quality Assured
As a professional applicator manufacturer, Huachenyang consistently adheres to high standards in quality control. The brand maintains clean production environments that comply with medical device standards and implements a strict quality management system. From raw material procurement to finished product delivery, every applicator is ensured to be safe and reliable. Huachenyang’s continuous innovation and professional qualifications make it a trusted partner in the medical care field.


Commit to Professional Care: Start by Choosing Huachenyang
Rooted in science, the Huachenyang Dual-Action Antimicrobial Applicator provides efficient, persistent antimicrobial protection through the synergistic action of CHG and IPA. Whether in medical environments or for family care, it helps enhance disinfection outcomes and mitigate potential risks.

For more product information or professional healthcare solutions, please visit the ‘About Us’ section on the Huachenyang official website or contact our customer service team. Follow Huachenyang, and let’s embark together on a journey towards more assured health protection.

Skin Disinfection Before Venipuncture: Usage Standards and Key Considerations for CHG Applicators

Skin disinfection prior to venipuncture is a critical step in preventing catheter-related infections. Using a CHG applicator for standardized disinfection significantly enhances efficacy. Mastering the correct usage protocol and understanding key precautions is an essential skill for every clinical healthcare professional. For quick clinical reference.


Standardized Steps: The CHG Version of the INS 2021 Five-Step Method
Following a standard operating procedure is fundamental to ensuring disinfection efficacy:

  1. Inspect: Confirm the package is intact and within its expiration date. Verify the product contains the effective formulation of 2% CHG + 70% alcohol.

  2. Open Package: Aseptically open the package. Hold the handle, ensuring the sponge head does not contact gloves or any other non-sterile surface.

  3. Apply: Using the intended puncture site as the center, scrub vigorously with sufficient pressure. Ensure the disinfection area has a radius ≥ 8 cm. Use a back-and-forth friction technique, continuing for approximately 30 seconds.

  4. Dry: Allow the area to air-dry completely. Do not fan or blow on it to accelerate drying. Do not puncture the site before it is fully dry.

  5. Puncture: Once the disinfected area is completely dry, needle insertion should be completed within 30 seconds.


Time Control: 30-Second Application + 30-Second Drying = The Golden 60 Seconds
Strict time control is crucial for both disinfection efficacy and patient safety:

  • Shortening the drying time may allow residual alcohol to enter the bloodstream, potentially causing chemical phlebitis or leading to false-negative blood cultures.

  • Excessively prolonging the wait time beyond complete drying increases the risk of airborne microbial fallout, potentially raising the contamination rate.

  • → Core Principle: Ensure a full 30 seconds of scrubbing and allow 30 seconds for natural air drying.


Pressure and Angle: How Should the Sponge Contact the Skin?
Correct pressure and angle ensure even coverage and effective penetration of the solution:

  • Pressure: Apply 1–2 N of pressure (approximately equal to the force needed to press a fingernail until it blanches) to ensure effective contact.

  • Angle: Maintain a 90-degree angle between the sponge and the skin to avoid dragging the edges, which can cause uneven application.


Common Errors and Quick Corrections
Be vigilant for these common errors in clinical practice:

Error Potential Risk Corrective Action
Puncturing before dry Residual alcohol irritation, Chemical phlebitis Strictly time the process; ensure 30-second drying
Re-wiping an already dry area Introducing external bacteria, causing recontamination Adhere to unidirectional wiping; avoid a second pass
Re-disinfecting after puncture Disrupting the formed protective film Proceed directly with needle insertion; no re-disinfection needed

Special Scenario Considerations
Disinfection procedures require adjustments in different clinical scenarios:

  • Neonates: Suitable for infants with gestational age >32 weeks and postnatal age >7 days. Closely monitor the skin for reactions like erythema after use.

  • Blood Cultures: To prevent skin flora contamination, discard the initial blood culture vial. After CHG disinfection, collect the sample for the second vial.

  • PICC Line Care: Use CHG to scrub the catheter hub and allow it to air-dry naturally for 15 seconds to ensure disinfection efficacy.


Huachenyang CHG Applicator Highlights
In product design and manufacturing, Huachenyang consistently adheres to strict medical standards. Its CHG applicator features the following highlights:

  • Packaging Design: Utilizes double-layer aluminum foil packaging with a clear sterile handling zone indicator, facilitating operation and maintaining sterility.

  • Sponge Head: Made from polyurethane foam, with liquid absorption precisely controlled at 3 mL ± 0.2 mL and a linting rate of ≤ 1 mg.

  • Manufacturing Process: Employs heat-sealing without adhesives, ensuring the product is free from fluorescent whitening agents and is compatible with PCR testing.


Frequently Asked Questions

Q1: Can the CHG applicator be used for arterial puncture disinfection?
→ Yes. The disinfection procedure is the same as for venipuncture, requiring adherence to the same application and drying standards.

Q2: Can it be used on broken skin or wounds?
→ Contraindicated. For open wounds, use normal saline for cleaning followed by sterile gauze.

Q3: How long can a single opened applicator be stored?
→ This product is for single-use only. It is designed to be used immediately upon opening and discarded after use. It must not be reused or stored.


Important Note: This product is a topical skin disinfection device. Its operation must strictly comply with the relevant infection control regulations of the healthcare institution.

Inadequate Disinfection with CHG Applicators? 3 Core Reasons and Mitigation Strategies

In clinical practice, the standardized use of CHG applicators is crucial for infection prevention. However, instances of inadequate disinfection often stem from a few easily overlooked details. This article systematically analyzes the core reasons for suboptimal results and provides practical mitigation strategies to help improve the disinfection success rate, intended for quick clinical reference.


Chlorhexidine Gluconate (CHG) Disinfection Applicators

Reason 1: Insufficient Dose – Evaporation of Storage Solution or Low Sponge Absorption
Effective disinfection first relies on an adequate volume and accurate concentration of the disinfectant solution.

  • Identifying Signs: After opening the package, the sponge head appears dry, shriveled, not sufficiently moist, or the observed liquid level is significantly below 2/3 of the sponge volume.

  • Potential Risk: An insufficient dose leads to a decrease in the concentration of the active ingredient (chlorhexidine). If the concentration falls below 1.5%, its bactericidal efficacy may decrease by up to 40% (based on internal validation averages), failing to achieve the intended effect.

  • Mitigation Strategies:

    • During Procurement: Choose products with individual aluminum foil packaging and check the labeled nominal absorption volume, which should be within the range of 3 mL ± 0.2 mL.

    • Before Use: Gently squeeze the sponge to confirm it is moist without dripping liquid, indicating good condition.

    • During Storage: Maintain storage environment temperature ≤ 25°C, relative humidity ≤ 60%, and avoid direct sunlight.

Reason 2: Non-standardized Operation – Failure to Allow Drying, Re-wiping, Insufficient Radius
Even with a qualified product, non-standardized operation can negate the disinfection effect.

  • Identifying Signs: Performing puncture within 30 seconds after application, re-wiping an area that has already dried, or using an insufficient disinfection area with a radius less than 8 cm.

  • Potential Risk: Incomplete drying can lead to chemical phlebitis due to residual alcohol, while the risk of bacterial residue may increase by approximately 0.3%.

  • Mitigation Strategies:

    • Core Operational Points: Adhere to unidirectional (one-way) wiping. Ensure the disinfection radius is ≥ 8 cm and the vigorous scrubbing time is ≥ 30 seconds.

    • Critical Waiting Period: After application, it must be allowed to air-dry naturally for ≥ 30 seconds. Do not fan the area or touch it with hands during this time.

    • Final Verification: Before puncture, visually confirm that the skin is completely dry.

Reason 3: Environmental Interference – High Temperature, High Humidity, Air Pollution
Improper storage and usage environments can directly compromise the stability of the disinfectant solution.

  • Identifying Signs: Storage room temperature exceeds 40°C, or water stains/damage are observed on the aluminum foil packaging.

  • Potential Risk: High temperature and humidity accelerate alcohol evaporation and chlorhexidine precipitation, potentially leading to up to 15% degradation of the active ingredient.

  • Mitigation Strategies:

    • Storage & Transportation Assurance: During transport and warehousing, using a 2–8°C cold chain is recommended, especially in summer, with added ice packs.

    • Pre-use Check: Always inspect the integrity of the aluminum foil packaging before use. Discard immediately if damaged.

    • Environmental Monitoring: Ensure air quality in the procedure area meets standards, with airborne bacterial counts controlled within ≤ 4 CFU/plate (5-minute exposure).


On-site Quick Verification: 3 Steps to Assess Disinfection Adequacy

When immediate microbiological testing is unavailable, use the following methods for quick verification:

  1. Visual Inspection: The disinfected skin should appear uniformly moist without a strong, lingering alcohol odor.

  2. Timing: The total time from the start of application to complete drying should be no less than 60 seconds.

  3. Fluorescent Marker (if available): Use a dedicated fluorescent marker solution. Observe under a UV lamp; if the coverage area is < 80%, re-disinfection and sampling are required.


Huachenyang CHG Applicator Troubleshooting Highlights

Addressing the common issues above, Huachenyang has implemented targeted optimizations in product design. Its CHG applicators feature the following troubleshooting highlights:

  • Packaging Barrier: Utilizes double-layer aluminum foil with an easy-tear notch design, offering a very low water vapor transmission rate to effectively protect the contents.

  • Liquid Visibility: Unique polyurethane sponge and packaging design provide a real-time viewing window for liquid absorption, allowing quick pre-use verification.

  • Traceability: Each product has an independent barcode and clear expiration date printed, ensuring precise traceability of any compromised batches.


Frequently Asked Questions

Q1: If disinfection seems insufficient, can I reapply?
→ Strictly prohibited. After the first application dries, it forms a protective film on the skin. Reapplying disrupts this film and introduces contamination risk.

Q2: How should I handle a puncture site with broken skin?
→ Do not use the CHG applicator. Clean the area with normal saline instead and protect it with sterile gauze.

Q3: How long can a single opened applicator be stored?
→ This product is for single-use only. It is designed to be used immediately after opening and discarded after use. It must not be reused or stored.


Important Note: This product is a topical skin disinfection device. Correct storage and standardized operation are prerequisites for ensuring disinfection efficacy.

How to take disinfection measures when winter flu comes

How to take disinfection measures when winter flu comes

When the winter flu arrives, it is crucial to take proper disinfection measures. The following details specific disinfection methods from different aspects:

Disinfection of Environmental Surfaces


  1. Air Disinfection
    • Natural Ventilation: Influenza viruses find it difficult to multiply and spread in well – ventilated environments. Open windows for ventilation at least 2 – 3 times a day, with each ventilation session lasting about 30 minutes. For example, ventilate between 9 – 10 am and 2 – 3 pm when the outdoor air quality is relatively good. This can effectively reduce the concentration of viruses indoors.
    • Air Disinfection Machines: Select air disinfection machines with the approval of the Ministry of Health for disinfection product hygiene licenses, and operate according to the product instructions. For instance, in crowded and relatively enclosed places such as offices and classrooms, use circulating air ultraviolet air disinfection machines, which can continuously disinfect the air while people are present.
  2. Disinfection of Furniture and Supplies
    • Surfaces of Tables, Chairs, Cabinets, etc.: Wipe with a chlorine – containing disinfectant with an effective chlorine content of 500mg/L. For example, dilute 84 disinfectant in a ratio of 1:100. Dip a rag in the solution and wipe the surface of the object. After 30 minutes of action, wipe with clean water to remove residual disinfectant.
    • Tableware: Boiling for 15 – 30 minutes is the preferred method. Alternatively, soak in a chlorine – containing disinfectant with an effective chlorine content of 250 – 500mg/L for 30 minutes, and then rinse thoroughly with clean water. For the daily use of bowls and chopsticks at home, boiling is a simple and effective disinfection method.
    • Toys: Plastic toys can be soaked in a chlorine – containing disinfectant with an effective chlorine content of 500mg/L for 30 minutes, then rinsed with clean water and dried. Plush toys can be exposed to the sun for 4 – 6 hours to utilize ultraviolet rays for disinfection.
  3. Floor Disinfection
    • Wet – mop the floor with a chlorine – containing disinfectant with an effective chlorine content of 500mg/L at least 1 – 2 times a day. For public areas with frequent human flow, such as shopping malls and hospital corridors, the number of disinfection times should be appropriately increased.

Disinfection of Personal Items


  1. Clothes and Bedding
    • They can be exposed to the sun, usually for more than 6 hours. Pay attention to turning them over during the process to ensure that all parts are fully exposed.
    • You can also use the disinfection function of the washing machine or add an appropriate amount of clothing disinfectant for cleaning and disinfection.
  2. Masks
    • For masks worn by the general public without obvious contamination, they can be hung in a clean, dry, and ventilated place or placed in a clean self – sealing bag.
    • Masks used by suspected or confirmed influenza patients should be treated as medical waste, collected and disposed of in accordance with relevant regulations, and should not be discarded casually.
  3. Small Items such as Mobile Phones and Keyboards
    • Wipe and disinfect with 75% ethanol cotton balls or disinfection wipes. Note that the power should be turned off first to prevent liquid from entering the device. Wait for a while after wiping until the ethanol completely volatilizes.

Precautions


  1. Standard Use of Disinfectants: Dilute and use disinfectants strictly in accordance with the product instructions to avoid excessive or insufficient concentration. Excessive concentration may damage humans and items, while insufficient concentration may not achieve the disinfection effect. Also, pay attention to the expiration date of the disinfectant, and expired products should not be used.
  2. Personal Protection: Wear gloves, masks and other protective equipment during the preparation and use of disinfectants to avoid direct contact of the disinfectant with the skin and respiratory tract. In case of accidental contact with the disinfectant, rinse immediately with a large amount of clean water, and seek medical attention if necessary.
  3. Safe Storage: Place disinfectants out of the reach of children to prevent accidental ingestion. At the same time, note that disinfectants should not be mixed with other cleaning products. For example, mixing 84 disinfectant with toilet cleaner will produce toxic chlorine gas, endangering life safety.

70% Alcohol & 2% Chlorhexidine Foam CHG707 SwabSticks

70% Alcohol & 2% Chlorhexidine Foam CHG707 SwabSticks

Description

CHG707 Foam Swab Sticks are a wetted pad adhered to a plastic stick which is used to sanitise the skin. They contain 70% Alcohol and 2% Chlorhexidine.

Chlorhexidine is a chemical antiseptic and is also bacteriostatic which means it kills both gram-positive and gram-negative microbes.

70% Alcohol & 2% Chlorhexidine Foam SwabSticks

Information

  • CHG707 Swab Sticks are larger than most common swabs which makes it easier for topical cleansing prior to injection.
  • Impregnated with an alcohol and chlorhexidine solution
  • Regular Size with an regular size foam head to maximise coverage area
  • Individually sealed in easy tear sachets
  • High moisture level
  • Low lint
  • Option to develop bespoke solutions

Product Variants

SKU CHG707
Format Box
Sachet 1 stick per sachet
Swab sticks per box 25
Boxes per carton  10


Uses

  • Hospitals
  • Renal Units
  • Acupuncture
  • Cosmetic surgery
  • Anywhere that requires topical cleansing prior to injection

How to solve the disinfection before surgery

How to solve the disinfection before surgery

Pre – operative Disinfection Solutions


Pre – operative disinfection is of utmost importance and involves the disinfection of surgical personnel and the patient’s surgical area. The specific solutions are as follows:

Disinfection of Surgical Personnel

General Preparation


Surgical personnel should change into special scrub suits and trousers in the operating room. The upper garment should be tucked into the trousers to prevent dust and bacteria on the clothing from contaminating the surgical area. At the same time, put on a hat and a mask. The hat should cover all the hair, and the mask should cover the mouth and nose. Trim the fingernails and remove the dirt under the nail edges.

Arm Disinfection

Soap – and – water Scrubbing Method


  • First, wash the arms with soap and running water.
  • Dip a disinfected scrub brush into boiled soapy water. Starting from the fingertips, scrub the fingers, palms, backs of the hands, forearms, elbows, and the lower one – third of the upper arms in sequence, scrubbing each section back – and – forth 3 – 5 times. The scrubbing area includes the hands, forearms, and the lower one – third of the upper arms, with special attention to the nail edges, nail grooves, finger webs, palm prints, and wrists.
  • Scrub each arm for 3 minutes, a total of 6 minutes for both arms.
  • Rinse the arms from the fingertips to the elbows with running water, allowing the water to flow from the hands to the elbows to avoid back – flow of contaminated water to the hands.
  • Dry the arms from the hands to the elbows with a sterile towel. The towel that has wiped the elbows should not be used to wipe the hands again.
  • Immerse the hands and forearms in 70% alcohol or 0.1% benzalkonium bromide solution for 5 minutes, with the immersion range up to 6 cm above the elbow. After immersion disinfection, keep the hands in an arched position to dry. The hands should not be lowered and should not touch any non – disinfected items.

Povidone – iodine Scrubbing Method


  • Rinse the hands, forearms to 10 cm above the elbow with clean water.
  • Dip a disinfected scrub brush into 0.5% povidone – iodine solution and scrub the hands for 3 minutes according to the sequence and range of the soap – and – water scrubbing method, ensuring that the povidone – iodine fully contacts the skin.
  • Rinse off the povidone – iodine with running water and dry with a sterile towel.
  • Then, smear the hands and forearms twice with a gauze soaked in 0.5% povidone – iodine. Wait for it to dry before putting on the surgical gown and gloves.

Chlorhexidine Scrubbing Method


  • Rinse the hands, forearms to 10 cm above the elbow with clean water.
  • Dip a disinfected scrub brush into 4% chlorhexidine solution and scrub for 3 minutes according to the conventional sequence. Ensure that the chlorhexidine solution fully contacts the skin during scrubbing to thoroughly clean the skin of the arms.
  • Rinse thoroughly with running water and dry with a sterile towel.
  • Take an appropriate amount of chlorhexidine alcohol disinfectant and smear it on the hands, forearms to 6 cm above the elbow. Wait for it to dry naturally before proceeding.

Wearing a Sterile Surgical Gown

Traditional Back – opening Surgical Gown


  • Pick up the two corners of the collar of the surgical gown with both hands, shake it open, being careful not to face the outer side of the surgical gown towards yourself.
  • Gently toss the surgical gown, and then insert both hands into the sleeves, stretching the arms forward. Do not raise the arms higher than the shoulders or spread them to the left or right to avoid touching non – disinfected items.
  • The circulating nurse assists in pulling up the surgical gown from behind and ties the collar and back straps.
  • The person wearing the gown crosses their hands, leans slightly forward, pinches the waistband with their fingers, and hands it to the rear for the circulating nurse to catch and tie.

Full – coverage Surgical Gown (also known as wrapped – back surgical gown)


  • The steps of putting on the gown are similar to those of the traditional back – opening surgical gown. First, put on the surgical gown and tie the collar strap.
  • After putting on sterile gloves, untie the loose knot at the waist, pull the back piece of the surgical gown forward to wrap the back, and then hand the waistband to the circulating nurse to tie tightly behind the back, so that the back of the surgical personnel can also be protected aseptically.

Wearing Sterile Gloves

Open – style Gloving Method

CHG IPA APPLICATOY


  • Take out the sterile talcum powder in the glove clip and gently apply it to both hands, being careful not to sprinkle the talcum powder in the surgical area.
  • Hold the folded part of the glove with the left hand, and insert the right hand into the glove, aligning with the five fingers.
  • Insert the four fingers (except the thumb) of the gloved right hand into the folded part of the left – hand glove. Then, the left hand inserts into the glove, and turn the folded part of the glove back to cover the cuff of the surgical gown.
  • Rinse the outside of the gloves with sterile saline to remove the talcum powder, preventing the talcum powder from irritating the tissues.

Closed – style Gloving Method


  • After putting on the surgical gown with the hands not yet extended out of the cuffs, hold the folded parts of the gloves with both hands through the sleeves and take out the gloves.
  • First, insert the right hand into the right – hand glove, being careful not to let the outside of the glove touch the surgical gown.
  • Use the gloved right hand to grab the folded part of the left – hand glove through the sleeve, and insert the left hand into the glove.
  • Turn the folded parts of the gloves back with both hands to cover the cuffs of the surgical gown, and then extend the hands out of the cuffs.

Disinfection of the Patient’s Surgical Area

Pre – operative Skin Preparation: One day before the operation